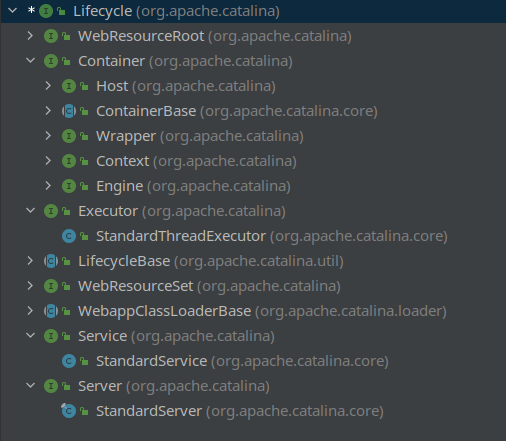
LifeCycle 接口
上一篇文章中提到,Tomcat 中主要有这些重要的组件:
- Server:Server 容器代表了一个 tomcat 实例(Catalina 实例),可以包含一个或多个 Service 容器;
- Service:Service 是提供具体的对外服务的,一个 Service 容器中可以有多个 Connector 组件(监听不同的端口请求并处理)和一个 Servlet 容器(做具体的业务处理逻辑);
- Engine 和 Host:Engine 组件是 Servlet 容器的核心,它支持定义多个虚拟主机(Host),虚拟主机允许 Tomcat 引擎在一台机器上配置多个域名;
- Context:每个虚拟主机下支持部署多个 Web 应用,这就是我们所熟悉的上下文对象。 Context 是使用由 Servlet 规范中制定的 Web 应用程序的格式表示,不论是压缩后的 war 格式还是为压缩的目录结构;
- Wrapper:在一个 Context 中可以部署多个 Servlet,并且每个 Servlet 都会被一个 Wrapper 所包含。
这些组件是层层包含的。 Tomcat 通过定义 LifeCycle 接口来统一管理各组件的生命周期。我们来看一下 LifeCycle 接口中定义了以下方法:
从 LifeCycle 这个类的继承关系中,我们也可以印证,如 Container 以及其包含的 Host, Engine, wrapper 和 Context 都实现了 LifeCycle 接口。
同样的,Service 和 Server 这两大组件也实现了 LifeCycle 接口,并分别被 StandardService 和 StandardServer 类实现。
启动入口分析
之前我们已经找到 Bootstrap 类是 Tomcat 程序的启动入口,那么我们是如何找到这个入口的呢?
首先,对于下载的 Tomcat Server,其启动入口是 bin/startup.sh 文件,他其实是启动了 catalina.sh,并传入了 start 参数:
那么我们再进去看 catalina.sh,搜索解析 start 参数的地方:
所以 Tomcat 启动的过程就可以简化理解为:
至此确认了 Tomcat 启动的入口就是这个 Bootstrap 类。
继续看 Bootstrap.main 方法:
这段初始化逻辑,实际上是:
- 实例化一个
Catalina对象并赋值给了 Bootstrap 中的成员变量catalinaDaemon - 实例化一个
Bootstrap对象并赋值给自己的成员变量daemon
接着往下看 Main 方法,这里指出了 Tomcat 启动的关键两个步骤:加载初始化阶段和启动阶段。
这里是典型的委派模式的应用。
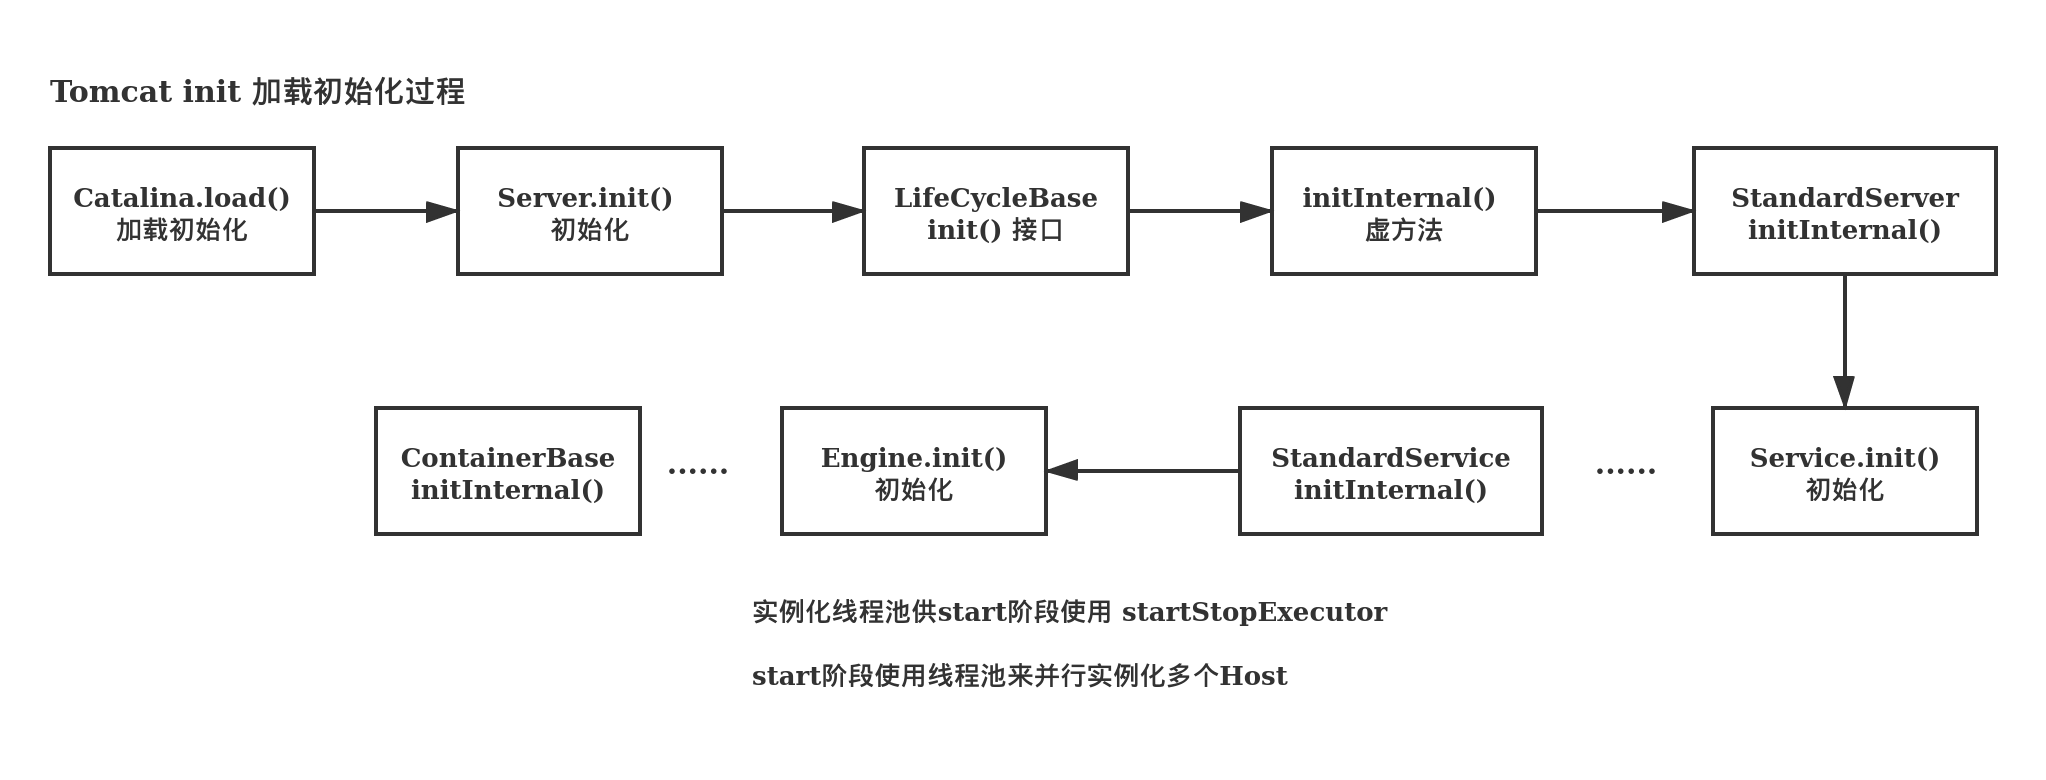
加载初始化阶段
Server 初始化
先看 Catalina.load()方法。
此时初始化来到了 Server.init()阶段,而这个接口定义在 LifeCycle.init()中,这里 LifeCycle 对 Server 对象的生命周期进行了管理。
在 StandardServer 中,通过一个遍历继续初始化下一级所有的 Service 容器。
Service 初始化
老规矩,Service 容器的初始化也要先去 LifeCycle 报道,然后实现其 initInternal()方法:
Engine 初始化
先看 Engine 对象的初始化逻辑。可以看到 StandardEngine 的初始化过程逻辑其实是在其父类 ContainerBase 中完成的。
可以看到 Engine 组件初始化阶段,其实就是创建了一个名叫 startStopExecutor 的线程池,这个线程池会在 Engine.start()过程中使用,并对应多个 Host 实例。
Connector 初始化
Connector 的初始化,主要是调用了 ProtocolHandler.init()方法。
继续看 AbstractProtocol.init()实现,其中调用了 Endpoint.init()方法来初始化 Endpoint 对象。
Endpoint 对象在初始化过程中调用了 bind()虚方法,最终由 NioEndpoint 类来实现:
这里的 NioEndpoint 对象初始化过程中,获取了 NIO Channel 并完成了 serverSock.socket()的端口绑定。
至此,Tomcat 启动过程中,主要组件的初始化逻辑基本完成了。

文章评论